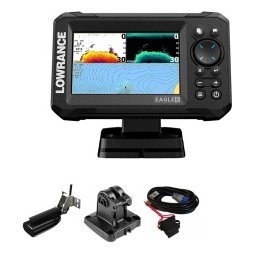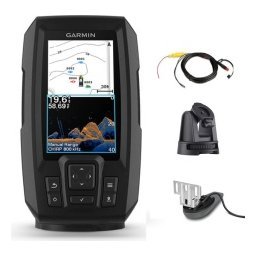
Trolling covers water efficiently, and a trolling with a fish finder setup makes it far more precise. Sonar shows where fish and bait are and how deep the bottom is, while GPS gives you true speed over ground, a visible track and waypoints for repeating passes. Together they let you hold a lure at the right depth, run a contour, find the school and return to it. This guide explains how to set up your fish finder for trolling, how speed and depth control work, how to use contours and tracks, how to combine sonar with downriggers and planer boards, and how to avoid common mistakes that waste a day of trolling.

Why trolling with a fish finder beats guessing
Trolling without electronics is guesswork. With a fish finder you have information.
See where fish are
Sonar shows fish and bait ahead of and below the boat, so you can steer through productive water instead of empty water.
Know your depth
You can set lures at a depth that matches fish, and follow bottom changes to avoid snags.
Control speed accurately
GPS speed over ground is more accurate than engine settings, because wind and current change your true speed. Our fish finder with GPS guide explains the benefits.
Repeat success
Tracks and waypoints let you repeat the pass that caught fish.
Set up your fish finder for trolling
Choose a clear screen layout
Use a split screen with sonar and a chart or speed readout. Save the layout as a preset. See our fish finder settings guide.
Check the transducer
At trolling speeds, a transom transducer usually reads cleanly. Make sure it is clean and positioned correctly. Our transducer guide shows how.
Set a shallow alarm
Use a depth alarm to avoid hazards.
Slow the scroll
A slower scroll helps you follow fish marks over time at low speed.
Control speed with GPS
Use speed over ground
Display speed over ground, not just boat speed. It shows the real speed of the lure through the water relative to the bottom, though current also affects it.
Compare speed through water
If your unit can show water speed, compare it with speed over ground to understand current. Adjust your lures accordingly.
Hold a steady pace
Make small throttle adjustments and watch the readout. Consistency helps lures work properly.
Follow contours and edges
Plan your route on the chart
Choose a depth contour and follow it. See our contour trolling with GPS guide.
Use the track
Your track shows where you have trolled. Make passes slightly offset to cover new water.
Turn gently
Wide, smooth turns keep lines straight and avoid tangles.

Use sonar to find fish while trolling
Watch for bait
Bait clouds and marks tell you to slow down or circle back. Our baitfish on a fish finder guide explains the signs.
Check the depth of marks
Match lure depth to the depth of fish.
Mark waypoints
When you catch a fish or see a school, mark a waypoint and return to it. See our marine GPS waypoints guide.
Combine sonar with downriggers and planer boards
Downriggers
Use sonar to choose the depth to set your downriggers. Keep lures above fish marks when possible.
Planer boards
Planer boards spread lines. Use GPS to keep a steady path and watch for turns.
Lead core and weighted lines
Use depth information to select the right line length.
Different waters, different approaches
Lakes and reservoirs
Troll along edges, points and channels. See our bass boat electronics guide for setups.
Rivers
Use GPS to hold position against current and watch for debris.
Coastal and offshore
Look for bait, temperature breaks and structure. See our offshore fishing electronics guide.
Safety and etiquette
- Keep a lookout for other boats and lines.
- Use lights at night.
- Keep rods and lines clear of the propeller.
- Respect other anglers’ lines and space.
Common mistakes
- Trolling too fast.
- Ignoring depth changes.
- Not marking productive passes.
- Turning too sharply.
- Neglecting transducer cleanliness.

A trolling session step by step
Start by choosing a contour or edge from the chart and setting a target speed. Run the first pass slowly, watching sonar for bait and fish. If you see marks, note their depth and adjust lures. If you catch a fish, mark a waypoint and the track position. On the next pass, repeat the successful line at the same speed. If bites fade, change depth, speed or lure colour one at a time. By the end of the session, review the track on screen and see which passes produced fish and which did not. This simple loop turns a day of trolling into data you can reuse.
Keep a trolling log
Record the date, water, depth, speed, lure and result for each good pass. Over a season you will see patterns, such as which depths and speeds work in which month, and that knowledge becomes the foundation of your own trolling playbook.
Choosing the right trolling equipment
A trolling setup combines rods, reels, lures and electronics, and each part supports the others. For electronics, look for a unit that shows sonar and speed on a split screen, stores tracks and waypoints and has a clear display in sun. A GPS-enabled fish finder is a strong all-round choice, and a larger screen helps when you want a chart on one side and sonar on the other. Our fish finder chartplotter combo guide explains how to choose. Remember to budget for a good transducer and clean power, which affect signal quality at every speed.
Rod holders and line management
Place rod holders where lines run clear of the propeller and each other, and keep the sonar screen visible from the helm. A tidy layout reduces tangles and lets you watch the screen while you troll.
Lures and depth control
Different lures run at different depths depending on line, speed and weight, so use your sonar to check how deep they are working. Adjust line out or weight until lures are at the depth of the fish you see. A depth reading from sonar combined with a speed reading from GPS makes this much easier.
Troubleshooting a poor trolling picture
If your screen looks poor while trolling, check the transducer position, because low-speed bubbles from turning, trolling motors or prop wash can interfere. Reduce noise by keeping power cables away from the transducer cable, and clean the transducer face. Slow the scroll speed so marks form arches. If the GPS speed jumps around, check that the antenna has a clear view of the sky, and consider a longer averaging setting if your unit offers one. A clean, steady picture makes every other trolling decision easier. If problems continue, see our fish finder troubleshooting guide.
Frequently asked questions
Can I troll with any fish finder?
Yes, but one with GPS makes it more precise.
How fast should I troll?
It depends on the species and lures, so use a steady speed and adjust until you find what works.
Does a transducer work at trolling speed?
Yes, usually very well at low speed.
What if I have no GPS?
Sonar still helps with depth, but speed control and repeating passes are harder.
Troll with information
A trolling fish finder setup gives you the depth, speed and position information that turns trolling from drifting hope into a repeatable method. Set up your screen, watch your speed, follow contours and mark what works. Browse fish finders and GPS in our shop and contact us for advice on equipment for trolling.
Related reading from Fishtrail Outfitters
- Fish Finder Transducer Guide: Types, Mounting and Getting a Clear Signal
- Fish Finder Chartplotter Combo: Is an All-in-One Unit Right for You?
- Garmin Marine GPS Guide: Choosing a Garmin Chartplotter or Fish Finder
- Contour Trolling With GPS: Follow Depth Lines to Find Fish
Products mentioned in this guide
- Fishfinder Garmin Striker Vivid 4CV + Sonar 77/200/455/800 KHz
- Fishfinder Garmin Striker Vivid 5CV + Sonar 77/200/455/800 KHz
- Fishfinder Garmin Striker Vivid 7CV + Sonar 77/200/455/800 KHz
Further reading: U.S. Coast Guard Navigation Center · Take Me Fishing: how to get started and where to fish
Questions before you buy? Contact Fishtrail Outfitters or browse the shop.