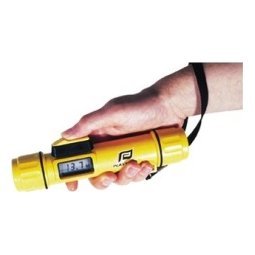
Most anglers spend more on a unit than on understanding it, and the right fish finder settings can make a modest display look far better than a premium one left on defaults. Menus can look intimidating, with dozens of options, but only a handful change what you actually see: range, sensitivity, noise rejection, colour palette, scroll speed and the sonar frequency you choose. This guide explains each one in plain language, gives sensible starting points, shows how to adjust them for shallow water, deep water and moving boats, and tells you how to save a good setup so you do not have to start again every trip.
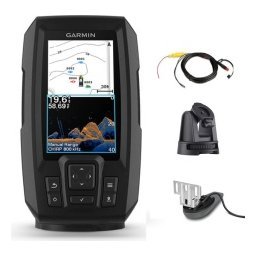
Start with automatic mode
Every modern unit has an automatic mode that adjusts range and sensitivity as you travel. It is designed to give a usable picture immediately.
Why auto is a good start
Auto mode follows the bottom, keeps it near the lower part of the screen and sets sensitivity so that fish and structure are visible. If you are new to your unit, spend your first few trips in auto and learn how the screen behaves before you change anything.
When to leave auto
Switch to manual when you want to study a particular depth band, ignore a noisy surface layer or hold a fixed range while you watch a school. Manual control gives you precision, but it needs a little attention as depth changes.
Range: how much water you see
Range sets how much of the water column appears on screen. A shallow range magnifies detail, and a deep range shows more water with less detail.
Matching range to depth
A good rule is to set a range slightly deeper than the water you are fishing so you can see the bottom and the fish above it. If the bottom drops off the screen, increase the range; if marks look tiny, reduce it.
Using zoom
Zoom magnifies a slice of the water column, often the bottom few metres, while keeping the full range visible. It is one of the most useful tools for spotting fish tight to structure. Our guide on how to read a fish finder explains what to look for in zoomed views.
Sensitivity and gain
Sensitivity, sometimes called gain, controls how strongly the unit listens for echoes.
Too high
If the screen fills with speckles and clutter, sensitivity is too high. You will see noise that is not fish, and real marks get lost in it. Reduce it until the clutter fades and the bottom looks clean.
Too low
If the bottom is faint and fish marks disappear, sensitivity is too low. Raise it until the bottom appears as a solid line and fish show as clear marks.
Fine-tuning for conditions
Murky water, soft bottoms and deep water often need a little extra sensitivity, while clear, shallow, hard-bottom water usually needs less. Adjust in small steps and give the screen a few seconds to update.
Noise rejection and surface clutter
Interference and surface bubbles add noise to a picture.
Noise filters
Many units have a noise rejection or interference filter. Use a low or medium setting to reduce speckles from the engine or other electronics. If problems persist, check wiring using our boat wiring basics.
Surface clutter
Surface clutter is the noisy band near the top of the screen. Adjusting surface clarity or the minimum range reduces it and prevents it from hiding fish near the surface.
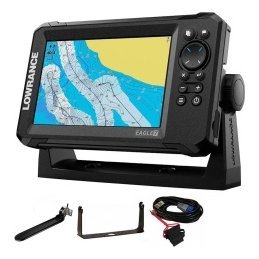
Choose the right frequency
Frequency determines how deep the sonar reaches and how detailed it looks.
Low versus high frequency
Low frequencies reach deeper and cover a wider cone, while high frequencies show finer detail in shallower water. Our fish finder frequency guide explains the trade-offs in depth.
CHIRP bands
CHIRP units offer bands or modes. Use a wide or low band in deep water and a narrow or high band in shallow water. Read our CHIRP fish finder article for more.
Colour palette and contrast
How the screen looks affects how quickly you read it.
Pick a palette that suits your eyes
Different palettes show strength differently. Choose one where the bottom, fish and bait are easy to separate and stay readable in bright sun.
Day and night modes
Use a dim palette at night to protect your night vision and a bright one in daylight. Adjust brightness before you leave the dock.
Scroll speed and history
Scroll speed controls how quickly the picture moves across the screen.
Matching speed to boat speed
A faster scroll helps at higher boat speeds, and a slower scroll keeps detail when you are drifting. If arches look stretched or squashed, adjust scroll speed.
Pausing and reviewing
Most units let you pause or scroll back. Use this to study a mark and press the waypoint button. See our marine GPS waypoints guide.
Fish symbols and depth alarms
Some features simplify the screen.
Fish symbols
Fish ID converts marks into icons. It helps beginners, but it can mislead, so compare with raw sonar as you learn.
Alarms
Shallow-water and fish alarms add safety and convenience. Set the shallow alarm to a depth that suits your boat.
Settings for different situations
Shallow water
Use a high frequency, a narrow range and lower sensitivity for detail. Slow down so the unit can update.
Deep water
Use a low frequency, wider range and slightly higher sensitivity. Zoom in on the bottom.
Fast boats
Use a faster scroll and make sure the transducer is clean and bubble-free. See our transducer guide.
Trolling and drifting
Use a steady range and a slower scroll to track fish over time.
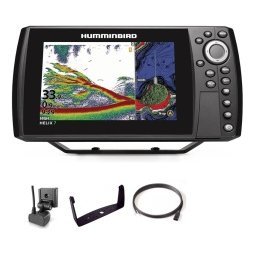
Save and reset
Once you find a good setup, keep it.
Save presets
Many units let you save a screen layout and settings. Create presets for shallow, deep and trolling, and switch quickly as conditions change.
Reset when confused
If the screen looks wrong, reset to default or auto and start again. Back up waypoints before resetting.
Common mistakes
- Leaving sensitivity too high and calling it fish.
- Using the wrong range for the depth.
- Ignoring noise caused by wiring.
- Changing many settings at once.
- Never reading the manual.
A quick starting recipe for settings
If you want a recipe, try this. Set range to auto and sensitivity to auto. Turn on a low noise filter. Choose a palette that shows fish strongly against a dark background. Set scroll speed to medium. Run a short pass over water you know and look at the picture. If the bottom is clean and fish are visible, leave everything alone. If clutter appears, reduce sensitivity by a small step. If marks are weak, raise it. Save the layout as your default. This takes five minutes and gives most anglers a solid base to build on.
Write down your best settings
Settings that work in one lake may differ from another. Keep a short note in your journal or phone with the settings for each water, and review it before each trip. Over a season you will build a personal set of presets that save time and improve your results.
Frequently asked questions
What are the best fish finder settings for beginners?
Start with automatic range and sensitivity, then adjust one setting at a time.
Why is my fish finder screen cluttered?
Often sensitivity is too high or there is interference. Reduce gain and check wiring.
Should I use fish symbols?
They help at first, but raw sonar gives more information.
How do I save my settings?
Look for a save or preset option in the menu.
Set it, test it, save it
The right fish finder settings give you a clear, trustworthy picture on every trip. Start in auto, adjust one control at a time and save what works. Browse fish finders in our shop and contact us if you want help choosing a unit with simple, intuitive controls.
Related reading from Fishtrail Outfitters
- Best Fish Finder for Beginners: How to Choose Your First Sonar
- Kayak Fish Finder Guide: How to Choose and Mount One on a Kayak
- How to Read a Fish Finder: A Beginner’s Guide to Sonar Screens
- Fish Finder Not Working? 12 Troubleshooting Steps to Get It Running
Products mentioned in this guide
- Fishfinder Garmin Striker Vivid 4CV + Sonar 77/200/455/800 KHz
- Fishfinder Garmin Striker Vivid 5CV + Sonar 77/200/455/800 KHz
- Fishfinder Garmin Striker Vivid 7CV + Sonar 77/200/455/800 KHz
Further reading: Take Me Fishing: how to get started and where to fish
Questions before you buy? Contact Fishtrail Outfitters or browse the shop.