The display gets the attention, but the fish finder transducer is the part that actually does the work. It sends sound into the water, receives the echoes and passes them to the screen, so a poor transducer or a poor mounting position will ruin an otherwise excellent unit. Anglers who struggle with noisy screens, missing bottom readings or fish that seem to disappear at speed usually have a transducer problem rather than a display problem. This guide explains what a transducer does, the main types, how to choose one for your boat and how to mount it so you get a clear signal on every trip.
What a fish finder transducer does
A transducer converts electrical energy into sound pulses and then converts returning echoes back into electrical signals. It is the ear and mouth of your sonar.
The cone of coverage
Sound leaves the transducer in a cone. The deeper the water, the wider the area covered at the bottom. Narrow cones give more detail and wider cones cover more ground. Your unit’s manual shows the cone angles for each frequency.
Why the face must be in clean water
Sound travels poorly through air bubbles. If bubbles pass under the transducer face, the signal drops out. Everything about good installation is about keeping that water smooth.
The main transducer types
There are several designs, and the best choice depends on your boat.
Transom mount
A transom mount transducer bolts to the back of the boat and sits in the water. It is the most common type for small and mid-size boats because it is affordable and simple to install.
Trolling motor mount
Some transducers fit directly to a trolling motor. They let you scan ahead of the boat and are popular with bass anglers. They need careful cable routing.
Thru-hull
A thru-hull transducer passes through a hole in the hull and sits flush with the bottom. It gives excellent performance at speed but requires drilling and professional-grade sealing.
In-hull
An in-hull transducer shoots through the fibreglass hull from the inside. It avoids drilling but has limits on materials and performance.
Portable and suction-cup
Portable transducers attach with a suction cup or arm. They suit kayaks, rental boats and anglers who share a unit between craft. Our portable fish finder guide covers this setup.
Choosing the right transducer for your boat
Match the type to how you fish and what you drive.
Small boats and kayaks
A transom or portable mount usually works best. Weight and simplicity matter more than top-end performance.
Bass boats
Many anglers use both a transom and a trolling motor transducer, which lets them see behind and ahead of the boat. Read our bass boat electronics guide for a fuller setup.
Larger boats and offshore
Thru-hull mounts suit boats that run fast or fish deep water. Ask for professional advice before drilling into the hull.
Matching a transducer to your display
A transducer must be compatible with the display. Different units use different connectors and frequencies.
Check the connector
Confirm that the plug matches the port on the display. Adapters exist for some combinations, but check before you buy.
Check frequency and sonar types
CHIRP, down imaging and side imaging each need appropriate transducer elements. A basic transducer will not deliver imaging. See our CHIRP fish finder article for context.
Ask before you buy
If a product page does not make compatibility clear, contact us and we will help you confirm it.

How to mount a transom transducer correctly
The position of the transducer is the biggest factor in how well it works.
Find the cleanest water
Look at the back of the boat while it is moving, or study how the water flows around the hull. The best spot is usually to the side of the engine, away from propeller wash, and ahead of any hull strakes.
Set the angle
The face should be roughly parallel to the water surface when the boat is at cruising speed. A slight downward tilt of the rear can reduce bubbles, but too much angle loses the bottom.
Set the depth
The bottom of the transducer should sit just below the hull bottom so it is always in the water without dragging.
Secure and seal
Use the supplied hardware, seal any screw holes with marine sealant and leave a loop in the cable to prevent strain.
Test and adjust
Take a trial run. If the picture is clear at idle but breaks up at speed, small adjustments to height and angle often solve it.
Cable routing and power
Cables are an easy place to introduce noise.
- Route the cable away from the engine ignition and other power cables.
- Avoid cutting or splicing the transducer cable.
- Use grommets where it passes through the hull or console.
- Keep connectors dry and clean.
Our guide to boat wiring basics explains how to keep sonar signals clean.
Troubleshooting common transducer problems
Most issues have simple fixes.
Bottom reading disappears at speed
Air bubbles are the usual cause. Lower the transducer slightly or adjust the angle.
Noisy, speckled screen
Electrical interference is common. Check for engine noise, separate power cables and good grounding.
Depth readings jump around
Weeds, debris or a dirty face can interfere. Clean the face and check for loose hardware.
No reading at all
Confirm the connector is fully seated, the cable is intact and the unit recognises the transducer. See our guide to troubleshooting a fish finder that is not working.
Caring for your transducer
A little care adds years of life.
- Rinse with fresh water after each trip, especially in salt.
- Clean slime and algae from the face.
- Do not paint over the face unless the manufacturer allows it.
- Lift or protect it when trailering.
Transducers in different water
Conditions affect sonar performance.
Shallow water
A narrower cone and higher frequency give more detail but take care not to strike the bottom.
Deep water
Lower frequencies and wider cones help reach depth.
Saltwater
Salt water absorbs signal. Choose a transducer suited to salt and rinse thoroughly.
Upgrading your transducer
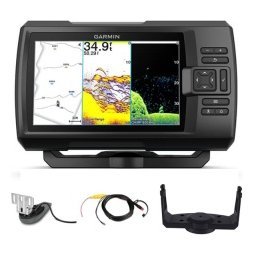
A better transducer can transform an older display. If your screen is fine but the picture is poor, check whether a compatible upgraded transducer is available. It is often the most cost-effective improvement you can make.
Understanding transducer frequency and cone angle
Two numbers on a transducer’s specification sheet shape what you will see: frequency and cone angle. They are worth a minute of your time before you buy.
Frequency
Lower frequencies travel farther through water and are favoured for deep fishing. Higher frequencies give sharper detail in shallower water but lose strength with depth. Many CHIRP transducers cover a range so that you can switch between a wide, deep view and a detailed, shallow one. Our article on fish finder frequencies explains the trade-offs in depth.
Cone angle
A wide cone covers more bottom but shows less detail per fish, while a narrow cone gives more detail but sees less area. In shallow water a wide cone helps you cover ground, whereas in deep water a narrow cone concentrates energy so signals return clearly. Picking a transducer with options for both gives you flexibility across different waters.
A simple installation checklist
Before you drill or tighten anything, run through a short checklist to avoid redoing the work later.
- Confirm the transducer is compatible with the display and sonar modes you want.
- Hold the transducer in position and test the signal on a trial run before final fixing.
- Check clearances for trailer bunks, rollers and the engine tilt range.
- Leave a drip loop in the cable and secure it with clips so it cannot snag.
- Record the final settings so you can restore them if anything gets knocked.
Taking an extra half hour here usually saves frustration on the water. If a hull shape or a console layout makes the choice unclear, send us the details through our contact form and we will point you in a sensible direction.
Finally, remember that a transducer is a wear item. Cables get pinched, faces get scratched and connectors corrode, so inspect yours at the start of each season. Look for cracks, loose fittings and green or white corrosion on the plug. Catching small problems early is far cheaper than losing a day on the water, and it keeps the sonar picture you paid for sharp and trustworthy.
Frequently asked questions
Where should I mount a fish finder transducer?
On the transom, in clean water, away from the propeller and hull features that cause turbulence.
Can I use any transducer with any fish finder?
No. Connectors and sonar types must match. Always check compatibility.
Why does my fish finder lose bottom at speed?
Usually bubbles under the transducer. Adjust height and angle or relocate it.
Can a transducer be repaired?
Cables sometimes can, but internal damage usually means replacement.
Final thoughts
The best display in the world cannot overcome a badly mounted fish finder transducer. Choose the right type, match it to your unit, mount it carefully and protect it, and your sonar picture will repay the effort. Browse fish finders and compatible parts in our shop, or contact our team if you need help with compatibility.
Related reading from Fishtrail Outfitters
- Bass Boat Electronics Setup: Console, Bow Unit and Transducer Layout
- Kayak Fish Finder Guide: How to Choose and Mount One on a Kayak
- How to Install a Fish Finder: Step-by-Step Guide for Any Boat
- Fish Finder for Pontoon Boats: Mounting, Power and Transducer Tips
Products mentioned in this guide
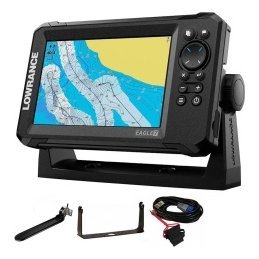
- Lowrance Eagle 5 CHIRP Splitshot Gps Fishfinder + 455/800 KHz Transducer
- Lowrance Eagle 5 CHIRP HDI Gps Fishfinder + 83/200/455/800 KHz Transducer
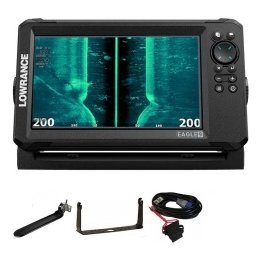
- Lowrance Eagle 5 CHIRP HDI Gps Fishfinder + 50/200/455/800 KHz Transducer
Further reading: GoPro official website · Take Me Fishing: how to get started and where to fish
Questions before you buy? Contact Fishtrail Outfitters or browse the shop.