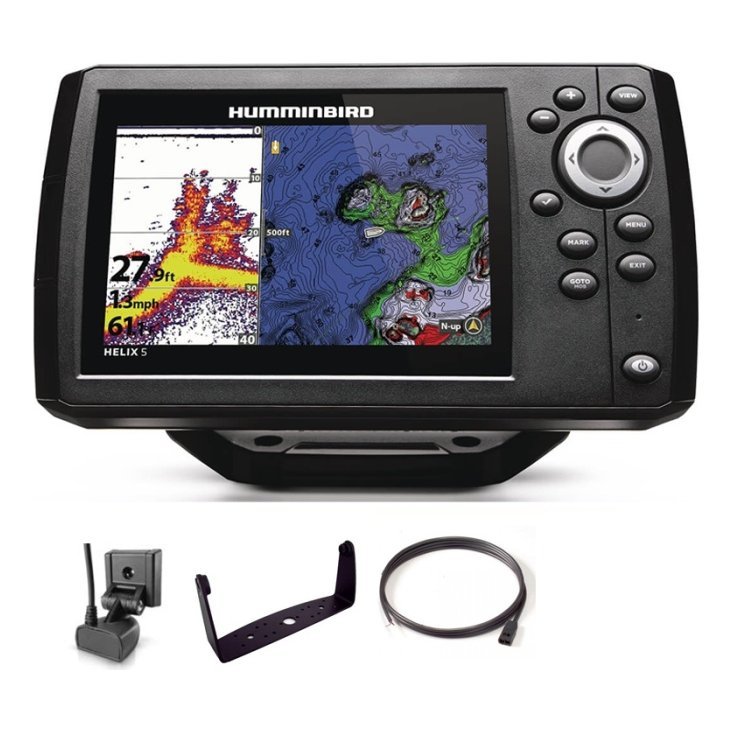
Anglers shopping for a new fish finder often reach the same fork in the road: side imaging vs down imaging. Both give a picture-like view of the bottom instead of the traditional arches and lines, but they look in different directions and solve different problems. One scans wide to the left and right of the boat, and the other looks straight down in fine detail. This guide explains how each works, where each shines, where each struggles and how to decide which one deserves your money, whether you fish a small lake, a winding river or a large reservoir.

What imaging sonar is, in simple terms
Imaging sonar uses very narrow, high-frequency beams to build a detailed, almost photographic view of the bottom and the objects on it. Traditional 2D sonar shows a slice directly beneath the boat as a scrolling line. Imaging sonar paints a richer picture, which is why anglers find it easier to recognise structure such as logs, rocks and brush.
Why imaging became popular
Imaging lets you see what a spot looks like, not just that something is there. That makes it easier to choose which piece of cover to cast to, which is a major advantage for anglers fishing unfamiliar water.
Imaging complements 2D sonar
Imaging does not replace 2D sonar. Most anglers run imaging beside a 2D CHIRP view so they can identify fish and structure at the same time. Our guide to the CHIRP fish finder covers the 2D side.
How down imaging works
Down imaging points a narrow beam straight beneath the boat. The result is a detailed, picture-like image of whatever passes under the transducer.
What down imaging does best
Down imaging excels at showing vertical structure such as standing timber, brush piles and weed edges. You can often tell a stump from a rock at a glance.
Limits of down imaging
Because the beam covers only the area under the boat, you have to drive over a spot to see it. Detail also fades as depth increases, so it is most useful in shallow to moderate water.
How side imaging works
Side imaging sends beams out to each side of the boat, scanning a wide strip of bottom as you travel. The display shows a picture of the bottom extending left and right of your track.
What side imaging does best
Side imaging is a search tool. You can find structure, drop-offs, channel edges and fish-holding features without driving directly over them, which saves time and reduces disturbance to fish.
Limits of side imaging
Side imaging takes practice to interpret, and it works best when the boat moves at a steady, moderate speed. It can also be harder to read in rough water or when the transducer is not mounted level.
Side imaging vs down imaging: the key differences
Placing the two views side by side makes the choice easier.
Coverage
Down imaging covers the water directly beneath you. Side imaging covers a wide area on both sides. If you want to search, side imaging wins. If you want to examine, down imaging wins.
Detail
Down imaging usually gives a more intuitive, detailed look at structure under the boat. Side imaging gives a broader but sometimes less detailed view of each object.
Learning curve
Down imaging is generally easier for beginners to read. Side imaging rewards time on the water.
Best use
- Down imaging: confirming structure, fishing directly over cover, judging cover type.
- Side imaging: locating new spots, mapping channels and covering water quickly.

Which is better for your type of fishing?
The right choice depends less on the technology and more on how you fish.
Small lakes and ponds
A small water you can search by eye does not demand side imaging. Down imaging adds plenty of value by revealing brush and timber.
Large reservoirs
Side imaging pays off on big water because it lets you cover more ground and find structure far from shore.
Rivers and creeks
Narrow channels limit how far side imaging can see, but it can still reveal wood and rock along the banks. Down imaging helps identify holes and seams.
Kayaks and small boats
Compact units with down imaging are often the sensible choice. Stability and mounting position matter more for side imaging, which can be harder to set up on very small craft.
Saltwater and docks
Imaging can reveal reefs, wrecks and pilings. For fishing around docks and bridges, see our guide on fishing docks and piers with sonar.
Do you need both?
Many mid-range and higher-end units offer both views. If your budget allows, having both gives you a search tool and an inspection tool in one package.
A sensible upgrade path
Start with 2D CHIRP and down imaging. Add side imaging when you find yourself wishing you could scan more water and are comfortable reading your screen.
Do not forget the transducer
Imaging quality depends heavily on a clean, level transducer mount. A good unit mounted poorly will produce confusing pictures.
Tips for reading imaging screens
Imaging pictures look unfamiliar at first. These tips speed up the learning curve.
Start with known spots
Run over a place you know well, such as a dock, a point or a launch ramp, and see how it looks on screen. Matching the picture with reality teaches you faster than any article.
Watch shadows
Taller objects cast a shadow behind them, which helps you judge height. A long shadow means a tall object.
Keep a steady speed
Boat speed changes stretch or squash the image. Moderate, steady speed gives the clearest result, especially for side imaging.
Mark what you find
Use waypoints to save promising structure so you can return later. Our guide to marine GPS waypoints shows how.
Mounting and setup tips
Mounting matters even more for imaging than for traditional sonar.
- Keep the transducer level and aimed correctly.
- Place it in clean water away from turbulence.
- Avoid mounting too close to the motor or other hull features.
- Use correct cable routing to prevent interference.
Common mistakes with imaging sonar
- Driving too fast, which smears the image.
- Expecting imaging to work in very deep water the way it does in shallow water.
- Ignoring 2D sonar, which is still needed for fish and depth.
- Skipping range adjustments for the water you are fishing.
Real-world scenarios: choosing between the two
Theory only goes so far, so here are a few situations that show how anglers use each view in practice.
Searching a new lake for brush and timber
On a lake you have never fished, start with side imaging at a steady speed along likely banks and channel edges. When a promising object appears, mark it with a waypoint, then circle back and run over it with down imaging to see how big it is and how it sits on the bottom. The two views together answer both where and what.
Fishing a single known spot more carefully
If you already know a stretch of the lake and just want to understand a specific piece of cover, down imaging is the better tool. Slow passes directly over the structure show how the branches sit, whether fish are stacked on one side and where the edges drop away. That detail helps you decide how to position the boat and where to cast.
Looking for channel edges and drop-offs
Channels and ledges often hold fish because they give them quick access to deeper water. Side imaging shows the shape of those edges as a scan, while 2D sonar tells you the exact depth change. Use the imaging picture to find the edge and the 2D view to confirm how steep it is.
Budget and value: what you are really paying for
Imaging features add cost, so it is worth asking what you gain for each step up. A unit with only 2D sonar is the cheapest way to get on the water. Adding down imaging is usually a modest step that gives a large improvement in how well you understand structure. Adding side imaging tends to cost more and also needs a transducer designed for it, so factor that into your budget.
Anglers who fish a lot of new water often find that side imaging pays for itself in saved search time. Anglers who fish the same few waters may get more from down imaging and a good set of waypoints. Think about how many hours you spend looking for fish versus fishing for them, and let that guide how much you invest in scanning ability.
Frequently asked questions
Is side imaging worth it?
For large or unfamiliar water, yes, because it saves search time. For a small pond, down imaging may be enough.
Is down imaging good for finding fish?
It shows fish and structure in detail, but 2D CHIRP is usually better for fish identification.
Can I use side imaging in shallow water?
Yes, though the scan width is limited by depth. Shallow water often shows narrower coverage.
Do I need to drive slowly?
Moderate, steady speeds give the best picture for both types.
Making your choice
The debate over side imaging vs down imaging is not about which technology is superior. It is about matching the tool to the job. Side imaging searches; down imaging inspects. If you can have both, you cover every situation. Explore fish finders with imaging features in our shop, or ask us which units suit your boat and your water.
Related reading from Fishtrail Outfitters
- How to Find Fish With a Fish Finder: A Practical Step-by-Step Method
- Fishing Docks With Sonar: Find Fish Around Docks, Bridges and Piers
- Humminbird Helix Fish Finder Guide: What the Helix Line Offers
- Fish Finder vs GPS Marine: Which Category Do You Need First?
- Vertical Jigging With Sonar: Drop to the Fish You See
Products mentioned in this guide
- Fishfinder Garmin Striker Vivid 4CV + Sonar 77/200/455/800 KHz
- Fishfinder Garmin Striker Vivid 5CV + Sonar 77/200/455/800 KHz
- Fishfinder Garmin Striker Vivid 7CV + Sonar 77/200/455/800 KHz
Further reading: Take Me Fishing: how to get started and where to fish
Questions before you buy? Contact Fishtrail Outfitters or browse the shop.