
Learning how to read a fish finder is the skill that turns an expensive screen into a genuine fishing advantage. At first glance a sonar display looks like a smear of colours, lines and speckles, and beginners often assume it is either broken or too complicated. In reality every mark on the screen has a simple meaning once you know the basics: the top is the surface, the bottom is the thick line, and everything in between is something the sound bounced off. This guide explains each part of a sonar screen, how fish, bait and structure appear, which settings clean up the picture and how to practise so that reading the display becomes second nature.
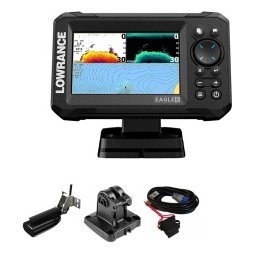
The basic layout of a sonar screen
Nearly every fish finder draws the same picture. Time runs from right to left, with the newest information appearing at the right edge and scrolling away to the left. Depth runs from the top of the screen, which represents the surface, down to the bottom of the range you have selected.
The depth scale
A scale along the side or the top shows the depth. As you move into deeper water, the scale adjusts automatically in most units, keeping the bottom visible. If the bottom line vanishes off the screen, you have probably set a manual range that is too shallow.
The digital depth readout
Most units also print the current depth as a number, often in a corner of the screen. This is the quickest reading to use while driving, and it is the one you will glance at most often when looking for drop-offs and shallow hazards.
Water temperature and speed
Many displays show water temperature and boat speed too. Temperature changes can reveal current seams and thermoclines that fish use, and speed helps you troll at a steady pace.
Understanding the bottom line
The bottom shows as a thick band across the screen. Its shape tells you the contour of the lake, river or sea bed, and its colour and thickness tell you about the bottom type.
Hard versus soft bottoms
A strong, thick, bright bottom line usually means a hard surface such as rock, gravel or sand. A thinner, weaker line often indicates soft mud or silt, which absorbs more of the signal. Hard bottoms can hold fish in spawning season, so learning the difference is useful.
Slopes, shelves and drop-offs
When the bottom line rises and falls, you are crossing slopes and ledges. A sudden step down is a drop-off, and these edges often attract fish because they give quick access to deeper water. Our article on fishing drop-offs and ledges with sonar goes deeper into this.
A double bottom echo
Sometimes you will see a faint second line below the real bottom. That is usually a repeated echo and is more common over hard bottoms in shallow water. It is not a deeper bottom, so ignore it.
What fish look like on a fish finder
Fish marks are the part everyone wants to understand, and they are more varied than the classic arch.
Fish arches
When a fish swims through the sonar cone, the unit records the echo growing stronger as the fish moves toward the centre and weaker as it leaves, which draws an arch. A full arch means the fish passed through the middle of the cone, and a half arch means it was at the edge.
Short dashes and blobs
When the boat is moving fast, arches stretch into short dashes or small blobs. They are still fish. The faster you move, the less arch-like they look.
Size and strength
A thicker, brighter mark usually means a larger target. But size is only a guide, because depth, angle and species all affect the strength of a return.
Fish near the bottom
Fish hugging the bottom can merge with the bottom line and vanish. A CHIRP unit can separate them better, as our CHIRP fish finder article explains.
Reading baitfish and schools
Baitfish are often more important than the fish you are chasing, because predators follow them.
Clouds and balls
A tight ball of baitfish appears as a dense, rounded cluster. A looser cloud is a wider, hazier patch. Predators often sit just below or beside bait.
Vertical streaks
Baitfish moving up or down can leave vertical trails. Watch how they change as you pass, because it shows how the school is behaving.
Why bait matters
If you find bait and structure together, you have found a high-percentage spot. See our guide to reading baitfish on a fish finder for more.

Structure, weeds and cover
Structure is where fish live. Learning to recognise it will improve your results quickly.
Rock and rubble
Rock produces a rough, uneven, strong bottom signature. Rubble looks like a jagged line with lots of bumps.
Timber and brush
Standing timber shows as vertical lines rising from the bottom. Brush piles show as a messy, dense cluster close to the bottom.
Weeds
Weeds appear as fuzzy, uneven growth above the bottom, and the edge of a weed bed is often a good place to fish.
Imaging makes it easier
Down imaging and side imaging draw more picture-like views of structure. See our comparison of side imaging vs down imaging.
The settings that matter most
You do not need to master every menu. Three settings make the biggest difference.
Range
Range sets how much water column you see. Auto range is fine to start. Manual range lets you zoom in on a particular depth band.
Sensitivity or gain
Gain controls how strongly the unit listens for echoes. Too high and the screen fills with clutter, and too low and real targets disappear. Adjust it until the bottom is clear and fish marks are visible without too much noise.
Colour palette and contrast
Choose a palette that suits your eyes and conditions. Bright palettes work in sun and softer ones are better at night.
Fish symbols
Many units can convert marks into fish icons with depths. Icons are handy for beginners, but raw returns provide more information, so switch to them as you learn.
Why your screen might look wrong
Several common problems cause confusing displays.
Noise and clutter
Speckles across the screen usually mean interference or gain set too high. Check power wiring, route cables away from the engine and lower sensitivity.
Gaps or a missing bottom
A missing bottom at speed often points to bubbles under the transducer. Our transducer guide explains how to fix it.
A screen that only shows numbers
If the unit shows depth but no picture, check that the sonar view is selected and the range is sensible.
Practising reading the screen
Skill comes from repetition.
- Drive over a known object, such as a dock, and see what it looks like.
- Fish the same marks you see and note what you catch.
- Take screenshots, if your unit allows, and review them at home.
- Compare your screen with a friend’s in the same spot.
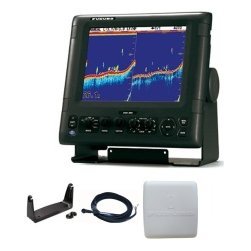
Practical tips on how to read a fish finder at speed
The way you read a screen changes with how fast you are travelling. These habits help in any conditions.
Slow down when you need detail
At trolling speed the sonar has time to draw clean arches and separate bait from fish. If you want to study a spot, slow the boat to a crawl and make a second pass. Fast runs are for searching, slow runs are for understanding.
Use zoom to magnify a depth band
Most units can zoom into a slice of the water column, such as the bottom few metres. Zooming doubles the visible detail where fish are holding, and it is one of the most useful features for finding fish tucked against cover.
Pause and review the history
Many units let you pause or scroll back through the sonar history. Use it right after crossing something interesting, then press the waypoint button so you can return. This habit turns a passing glance into a lasting record of what the screen showed.
Reading the screen in different seasons
What you see changes with the seasons, and knowing the pattern makes the marks easier to interpret.
Spring
Fish move shallow to feed and spawn, so look for marks near hard bottoms, weed edges and warming bays. Bait often shows up in the same places, which helps you confirm you are in the right area.
Summer
Warm water pushes fish deeper or into shade. You will often see them near thermoclines, deep structure or cover that offers shade. Our thermocline guide shows what that layer looks like on screen.
Autumn and winter
Bait gathers in large schools, and predators follow. Cold-water fish often hold tight to structure and move slowly, so detail matters. Slow passes and a carefully tuned gain setting help you spot them.
Frequently asked questions
Why do I see fish arches only sometimes?
Arches form only when the boat is slow enough and the fish passes through the cone. Faster movement turns arches into dashes.
What does a thick line near the bottom mean?
Often a hard bottom, but it can also be fish close to the bottom. Compare with other passes.
Do fish finders show fish size?
Roughly. Stronger marks suggest bigger targets, but depth and angle affect them.
Should I use fish icons or raw sonar?
Start with icons if you wish, but move to raw sonar to learn more.
Putting it all together
Once you know how to read a fish finder, every trip becomes a lesson. Check depth, read the bottom, look for bait and structure, then confirm what you see with a cast. Our shop carries fish finders to suit every level, and our team is happy to answer questions about getting the most from your screen.
Related reading from Fishtrail Outfitters
- Best Fish Finder for Beginners: How to Choose Your First Sonar
- Fish Finder Not Working? 12 Troubleshooting Steps to Get It Running
- Baitfish on a Fish Finder: How to Spot Bait and the Predators That Follow
- Fish Finder Settings Guide: The Controls That Make Your Screen Clearer
Products mentioned in this guide
- Fishfinder Garmin Striker Vivid 4CV + Sonar 77/200/455/800 KHz
- Fishfinder Garmin Striker Vivid 5CV + Sonar 77/200/455/800 KHz
- Fishfinder Garmin Striker Vivid 7CV + Sonar 77/200/455/800 KHz
Further reading: Take Me Fishing: how to get started and where to fish
Questions before you buy? Contact Fishtrail Outfitters or browse the shop.

