Knowing how to install a fish finder properly is the difference between a unit that works beautifully and one that gives noisy, unreliable readings. The good news is that most installations are well within reach of a patient angler with basic tools. The work breaks into four jobs: choosing positions, running power, mounting the transducer and testing the system on the water. This guide takes you through each stage in order, explains what to check before you drill anything, and lists the mistakes that cause most sonar problems so you can avoid them from the start.
How to install a fish finder: plan before you drill
Good installations begin on paper. Spend time planning and the physical work becomes straightforward.
Gather the manual and the parts
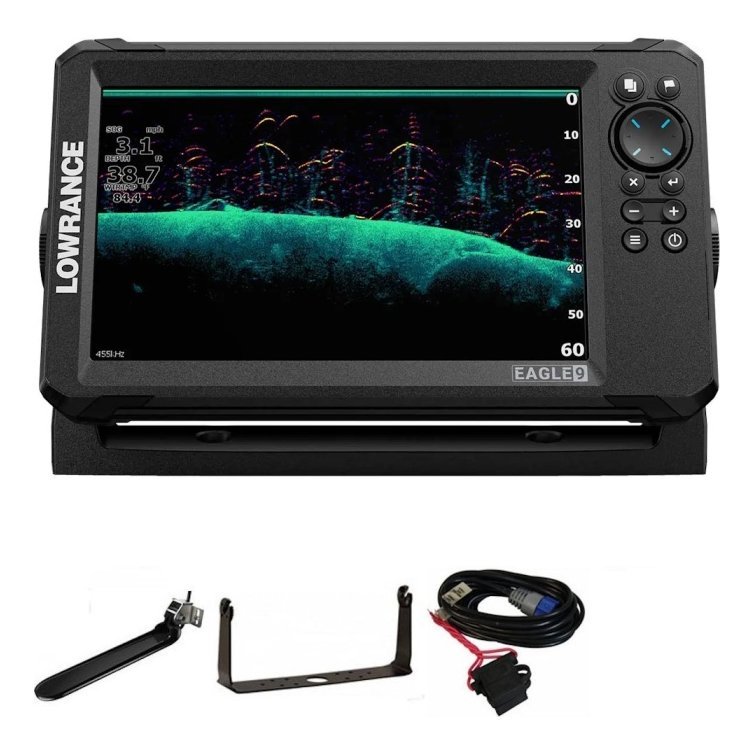
Read the installation instructions that come with your unit and lay out every part: display, bracket, transducer, power cable, fuse holder and hardware. Check that nothing is missing before you begin.
Choose the display position
Sit in your normal driving or fishing position and decide where the screen will be easiest to see. It should be visible at a glance, out of direct spray and away from sources of heat.
Plan the cable routes
Trace the path from the display to the battery and from the transducer to the display. Aim for short, tidy runs that avoid sharp bends and sources of interference such as the engine ignition.
Collect the tools
You will usually need a drill, bits, screwdrivers, a wire stripper and crimper, marine sealant, cable ties and a multimeter. Having everything at hand makes the job faster and neater.
Step 1: Mount the display
Mounting comes first because it fixes your cable lengths.
Bracket mount
A bracket mount holds the display on a swivel so you can tilt it to reduce glare. Fix the bracket with the hardware supplied, using backing plates where the surface is thin.
Flush mount
A flush mount cuts the display into a panel for a clean look. Use the supplied template carefully, because mistakes in cutting are hard to fix. Our fish finder mount guide compares bracket, flush and portable mounts.
Check the viewing angle
Before tightening everything, sit in position and check glare and reach. Small adjustments now save frustration later.
Step 2: Run the power
Clean power is the most important wiring job.
Choose the right battery
A dedicated battery helps keep sonar noise down, especially when the starter or trolling motor shares the main battery. A small deep-cycle battery is a common choice for smaller boats.
Fit an inline fuse
Fit a fuse close to the battery on the positive wire. This protects the cable and the unit if a short occurs. Use the fuse rating recommended in the manual.
Use good connections
Crimp or solder connections carefully and seal them against moisture. Heat-shrink connectors with adhesive linings are a good choice for marine use. Our boat wiring basics guide goes into more detail.
Keep power and signal apart
Route the power cable away from the transducer cable and from engine wiring. Crossing at right angles is better than running them side by side.
Step 3: Mount the transducer
This is the step that most affects your sonar picture.
Find clean water
On a transom installation, mount the transducer where water flows smoothly at speed, usually to the side of the propeller and away from hull strakes.
Set the height and angle
The transducer face should sit just below the hull bottom and be roughly parallel to the water surface at cruising speed. Adjust in small steps.
Secure and seal
Fix the bracket with the supplied hardware and seal any holes in the transom with marine sealant. Leave a slack loop in the cable to avoid strain. Our fish finder transducer guide explains each mounting type in detail.
Other mounting types
Trolling motor, thru-hull and in-hull transducers each have their own steps. Follow the manufacturer’s instructions closely, and consider professional help for thru-hull work.
Step 4: Connect and tidy the cables
Once everything is positioned, connect it.
Plug in the transducer
Match the connector carefully. Pushing it in at the wrong angle can damage pins. Secure it according to the manual.
Connect to power
Connect the red wire to the fused positive and the black wire to negative. Check polarity twice.
Secure the cables
Use clips and ties to hold cables off the bilge floor and away from moving parts. Leave a service loop near the display so you can disconnect it for storage.

Step 5: Power up and configure
With everything connected, switch on the unit.
First-time setup
Select your language, units and boat type if prompted. Set transducer type if the unit does not detect it automatically.
Check basic readings
In water, the unit should show depth. On a trailer or on dry land you will see no reading, which is normal.
Set up GPS
If the unit has GPS, give it a clear view of the sky and let it acquire a position. Our guide to a fish finder with GPS explains what you can do next.
Step 6: Test on the water
A trial run proves the installation.
Test at idle and at speed
Check the depth reading at idle, then at cruising speed. If the bottom signal drops at speed, bubbles are reaching the transducer and you need to adjust height, angle or position.
Look for noise
A speckled screen suggests interference. Try switching off other equipment to find the source, such as bilge pumps or radios.
Fine-tune settings
Adjust range and gain until the picture is clear. Our guide on how to read a fish finder helps you interpret the display.
Common installation mistakes
- Mounting the transducer in turbulent water.
- Skipping the inline fuse.
- Running the power cable beside the engine ignition wiring.
- Cutting or splicing the transducer cable.
- Forgetting a drip loop where cables enter the console.
- Not testing before the first fishing trip.
Troubleshooting after installation
If something does not work, check these in order.
No power
Check the fuse, the connections and the battery voltage.
No depth reading
Confirm the transducer is plugged in, submerged and compatible with the display.
Intermittent readings
Look for loose connectors or bubbles under the transducer. Our guide to fish finder troubleshooting lists more fixes.
Do you need a professional?
Many anglers install their own units successfully. But drilling the hull, wiring larger systems or running complex networks may warrant professional help. If you are unsure, it is cheaper to ask than to repair a mistake.
Tools and supplies checklist
A well-stocked toolbox makes any installation smoother. Gather these before you begin and you will not have to stop halfway to search for a missing item.
- Drill and a set of sharp bits suited to your boat’s material.
- Screwdrivers and a small socket set.
- Wire strippers, a crimping tool and marine-grade connectors.
- Heat-shrink tubing and a heat gun or lighter used with care.
- Marine sealant for any holes through the hull or console.
- Cable ties, clips and adhesive mounts.
- A multimeter for checking voltage and polarity.
- Masking tape and a marker for planning drill positions.
Tips for different boat types
Every hull presents its own challenges, so adapt the basic steps to your craft.
Aluminium boats
Avoid drilling more holes than necessary, and use rubber washers to cushion fittings. Protect cables from sharp edges with grommets. Our jon boat fish finder guide covers this style of boat.
Fibreglass boats
Seal every hole to keep water out of the core. A backing plate spreads the load under the display bracket.
Inflatable and small craft
Use portable transducers and removable mounts that avoid puncturing the hull. A compact battery in a dry bag keeps everything protected.
Looking after your installation
An installation is not finished when the last cable tie is cut. Check the mounting hardware after the first few trips, because vibration can loosen fittings. Inspect the cable runs for chafing and keep connectors clean and dry. At the end of each season, remove the display if you can, store it in a dry place and recharge the battery. A short inspection routine keeps the system dependable and helps you spot small problems before they cost you a day of fishing.
Frequently asked questions
How long does it take to install a fish finder?
Most simple installs take a few hours when well planned, but allow extra time for the first attempt.
Can I install a fish finder on a small boat?
Yes. Compact units, portable transducers and small batteries make small-boat installs simple.
Do I need a separate battery?
It is not mandatory, but a dedicated battery reduces electrical noise and protects your starting battery.
Where should I mount the transducer on a boat?
In clean, undisturbed water on the transom, to the side of the propeller.
Ready to get started?
If you now know how to install a fish finder, the next step is choosing the unit. Browse fish finders and mounting gear in our shop. If you have questions about compatibility or hull type, contact us and we will help you plan your installation.
Related reading from Fishtrail Outfitters
- Fish Finder Transducer Guide: Types, Mounting and Getting a Clear Signal
- Kayak Fish Finder Guide: How to Choose and Mount One on a Kayak
- Fish Finder for Pontoon Boats: Mounting, Power and Transducer Tips
- Bass Boat Electronics Setup: Console, Bow Unit and Transducer Layout
Products mentioned in this guide
- Lowrance Eagle 5 CHIRP Splitshot Gps Fishfinder + 455/800 KHz Transducer
- Lowrance Eagle 5 CHIRP HDI Gps Fishfinder + 83/200/455/800 KHz Transducer
- Lowrance Eagle 5 CHIRP HDI Gps Fishfinder + 50/200/455/800 KHz Transducer
Further reading: GoPro official website · Take Me Fishing: how to get started and where to fish
Questions before you buy? Contact Fishtrail Outfitters or browse the shop.