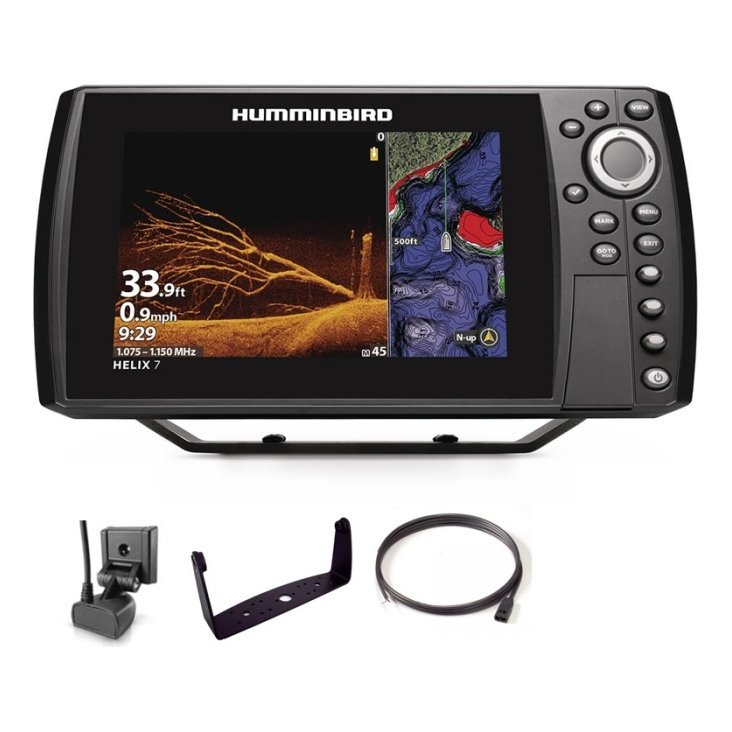
Choosing the best fish finder for beginners can feel overwhelming when every box promises more detail, more power and more features than the last. The truth is simpler: the right first unit is the one you will understand within a single trip, mount without a struggle and keep using for years. This guide walks through every decision a new angler faces, from screen size and sonar type to GPS, transducers, power and budget, so you can shop with confidence and spend more of your time actually fishing.

What a fish finder actually does for a new angler
A fish finder sends sound pulses into the water and listens for the echoes that bounce back. The unit turns those echoes into a picture of the bottom, the structure sitting on it and anything suspended in between. For a beginner, that picture answers three questions that used to take years of local knowledge to answer: how deep is it here, what is the bottom made of, and is anything worth casting to?
Depth and bottom shape
The first thing you will use on any unit is the depth reading. Knowing the depth lets you fish the right part of the water column, avoid running aground and spot the drop-offs and shelves that fish like to hold near. A good first fish finder shows depth clearly and updates quickly as the boat moves.
Structure and cover
Rocks, timber, weed beds and sunken brush all show up as changes in the line of the bottom. Learning to recognise them is the fastest way to improve your catch rate, and a clean display makes that learning curve gentler. Our guide on how to read a fish finder pairs well with this article once your unit is on the boat.
Fish arches and baitfish
Fish often appear as arches or small marks, and baitfish appear as clouds or balls. Beginners sometimes expect every fish to look like a perfect arch, but real screens are messier. Do not be discouraged: reading the marks gets easier with every outing.
Start with your water, not the box
Before comparing any model, write down where you fish most. A small pond, a winding river, a big reservoir and open coastal water each ask different things of a fish finder. Shallow, clear water needs less sonar power than deep, dark water. If you fish one local lake most weekends, a modest unit will serve you well. If you plan to travel or to move up to bigger water, choose something with a little more range so you do not outgrow it by next season.
Freshwater or saltwater
Most entry-level units work in both, but salt water absorbs sonar energy faster and is rougher on equipment. If you fish salt, check that the unit and its transducer are suited to it and rinse everything with fresh water after each trip.
Boat size and type
A kayak, a jon boat, a bass boat and a pontoon all have different mounting and power constraints. Think about where the display will sit, where the transducer will go and how you will run the wiring. We cover these differences in more detail in our guides for small boats, jon boats and pontoons.
Screen size: bigger is not always better
A larger display shows more detail and makes split-screen views practical, but it also costs more, draws more power and needs more room on the console. For a small boat or kayak, a compact screen is often the sensible limit. On a bigger boat, a larger screen lets you view sonar and a map side by side.
Resolution and sunlight
Screen size is only half the story. A bright, high-resolution screen that you can read in direct sun is worth more than a bigger screen that washes out at noon. If you can view a unit in daylight before buying, do. Glare is the most common complaint beginners have after their first trip.
Buttons or touch
Some units use buttons and a keypad, others use a touchscreen. Buttons are easier with wet hands and in chop; touch is quicker for scrolling charts. Neither is wrong, so choose the one that suits how and where you fish.
Sonar types explained in plain language
You will meet a handful of sonar terms on every product page. Here is what they mean and which ones a beginner should care about.
2D sonar
Traditional 2D sonar shows what is directly beneath the boat as a scrolling picture. It is the foundation of every fish finder and the view you will use most as a beginner.
CHIRP sonar
CHIRP sonar sweeps through a range of frequencies instead of sending a single pulse. The result is cleaner separation between fish, bait and structure. For a first unit, a solid 2D display with CHIRP is the best return on your money. Our article on CHIRP fish finders explains the technology in more depth.
Down imaging
Down imaging produces a more picture-like view of what is directly below the boat. It is excellent for spotting standing timber and brush, and it is a nice upgrade when you know you want it.
Side imaging
Side imaging scans out to each side of the boat so you can find structure without driving over it. It is powerful but takes practice to interpret, so many beginners add it later. See our comparison of side imaging and down imaging when you are ready.
Do you need GPS on day one?
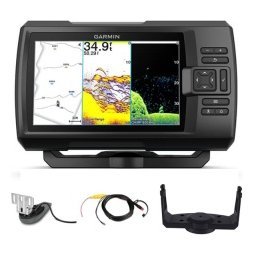
GPS lets you mark waypoints such as a brush pile, a ramp or a rocky point, and return to them later. It also shows your speed and track. If you fish unfamiliar water or want to repeat productive spots, built-in GPS is well worth having. If you only fish a small pond you know by heart, you can start without it.
Waypoints made simple
Marking a waypoint is usually a single button press. Over a season, a handful of well-labelled waypoints become a personal map of the water. Our guide to marine GPS waypoints shows how to build one.
Maps and charts
Some units include basic maps, and others let you add detailed charts. If you fish large lakes or the coast, charts add safety and planning value. If you fish small waters, you may not need them at the start.
The transducer matters more than most beginners expect
The transducer is the part that sits in the water and does the actual sensing. A great screen with a poorly mounted transducer will still give you a poor picture. Transducers mount in several ways: on the transom, through the hull, on a trolling motor or on a portable arm.
Transom mount
This is the most common choice for small and mid-size boats. It bolts to the back of the boat and is relatively simple to fit. Position matters: it must sit in clean, undisturbed water.
Portable mount
If you borrow boats, rent them or fish from a kayak, a portable setup lets you move the transducer easily. It is a flexible way to start. Read our portable fish finder guide for the trade-offs.
Power, wiring and mounting
Fish finders need a stable power supply, usually a 12-volt battery. A small dedicated battery keeps the sonar clean of the electrical noise that comes from a starter or a trolling motor. Plan the wire runs before you buy so you know how much cable you need and where it will pass through the boat.
Keep connections dry
Moisture is the enemy of every marine connection. Use the supplied seals, keep plugs above the bilge water and consider dielectric grease where the manufacturer allows it.
Mount where you can see it
The best display position is one you can see at a glance without taking your eyes far from the water. Test the angle before you drill anything.
Features beginners can skip, and features worth paying for
Beginners often overspend by buying features they will not use for a year. A little restraint here leaves budget for a better transducer, a proper battery or the mount that makes the whole thing work well.
Worth paying for
- A readable, bright screen that suits your boat.
- CHIRP sonar for cleaner target separation.
- Built-in GPS if you fish more than one spot.
- A transducer that matches your boat and mounting plan.
Fine to add later
- Advanced imaging modes you do not yet know how to read.
- Premium charts for water you rarely visit.
- Networking with other devices, until you own other devices.
How to set a realistic budget
Set a budget that covers the unit, the transducer, a mount, a battery and the wiring or fuse you need. Many first-time buyers set aside money for the display only and then discover they also need a battery or a bracket. Our marine electronics budget guide helps you plan the whole setup instead of a single part.
Buy for this season, leave room to grow
Buy for the angler you are now, with a little room to grow. If you outgrow a modest unit, the experience you gained on it will make your next purchase far better informed.

Brands you will see while shopping
The market is led by well-known names. At Fishtrail Outfitters you will find fish finders from brands such as Lowrance, Humminbird, Garmin, Deeper, Furuno, Simrad and Plastimo. Each has its own menu style and strengths, so browse several and compare product pages in our shop. If you are comparing two big names, our Lowrance versus Humminbird article is a useful next read.
Your first trip: a simple routine
Once the unit is installed, keep your first trip simple. You are learning to read the screen, not to catch a personal best.
Before you leave the ramp
Power the unit on, check that it shows depth in the water and make sure the transducer is fully submerged.
On the water
Drive slowly across a spot you know. Watch how the bottom changes on screen and compare it with what you know about the water. Mark a waypoint where the picture and your knowledge agree.
After the trip
Rinse the transducer and cables, dry the display and save your waypoints. A short routine keeps the unit reliable season after season.
Common beginner mistakes
- Buying the biggest screen the boat cannot comfortably fit.
- Ignoring the transducer position, which causes noisy or missing readings.
- Running sonar from the same battery as the starter.
- Expecting every fish to look like a textbook arch.
- Skipping the manual and missing simple settings that clean up the picture.
Frequently asked questions
What is the best fish finder for beginners on a small budget?
A simple unit with 2D CHIRP sonar, a readable screen and a transducer suited to your boat gives the best value. Add GPS if you want to save fishing spots.
Do I need a fish finder with GPS as a beginner?
Not always, but GPS is helpful if you fish more than one spot or fish larger water. It lets you mark and revisit productive places.
How hard is it to install a fish finder myself?
Many beginners install their own. Plan the power wiring and transducer position first, and read our guide on how to install a fish finder.
Can I use a fish finder from a kayak?
Yes. Look for compact, low-power units and portable transducer mounts designed for small craft.
Ready to choose your first fish finder?
The best fish finder for beginners is a clear, simple, well-installed unit that matches your water and your boat. Browse the fish finders in our shop, and if you are unsure which model fits your boat, contact us with details of your boat, your water and the fish you chase. We have spent years helping anglers pick sensible first setups, and we are glad to help you too.
Related reading from Fishtrail Outfitters
- How to Read a Fish Finder: A Beginner’s Guide to Sonar Screens
- CHIRP Fish Finder Explained: How CHIRP Sonar Works and Why It Matters
- Kayak Fish Finder Guide: How to Choose and Mount One on a Kayak
- Fish Finder Not Working? 12 Troubleshooting Steps to Get It Running
- 7 Inch Fish Finder Guide: Is Seven Inches the Right Screen Size?
Products mentioned in this guide
- GPS Fishfinder Humminbird Helix 5 G3 CHIRP DS 2D + Sonar 140/240 KHz
- GPS Fishfinder Humminbird Helix 5 G3 CHIRP XD 2D + Sonar 50/200 KHz
- GPS Fishfinder Humminbird Helix 5 G3 CHIRP DI + Sonar 140/200/455 KHz
Further reading: Take Me Fishing: how to get started and where to fish
Questions before you buy? Contact Fishtrail Outfitters or browse the shop.